
When we take photos, sometimes we get everything right in-camera and sometimes we need to improve them a bit more in post-processing using an image editing program (I use Adobe’s Lightroom). Aside from tweaking my shots to make them brighter,
fixing any awful color cast, straightening out the crooked horizon, removing dust and distracting objects, we can also blur the background to create more depth of field (DOF). Take a peek at my Chocolate Chip cookies
here, it was a bad day, bad lighting, and I didn't feel like lugging everything to the studio (I was full of excuses that day). We all have days like this working with photography, be it a professional or a novice. It's fixable.
{Take as many photos as possible}
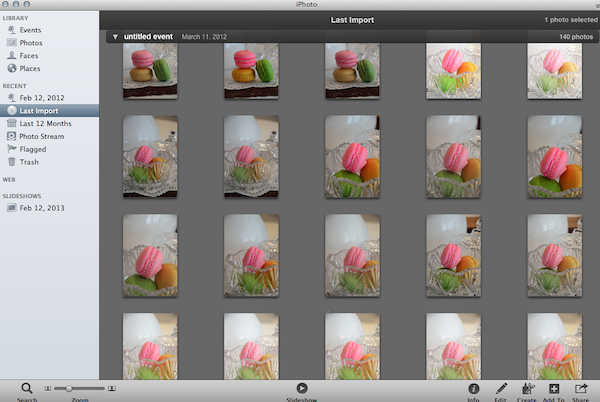
“What’s depth of field?” you might ask. Let me quote Wikipedia! “Depth of field (DOF) is the distance between the nearest and farthest objects in a scene that appear acceptably sharp in an image.” Simply put, it’s the area in your photo that looks focused compared to the rest of the image. If your photo is completely in focus, with everything sharp and defined, it’s called “deep focus” or having a great depth of field. If only your subject is clear while the foreground and background are blurry, it’s called “shallow depth of field.” This gives the impression of distance as the background looks farther away from the subject.
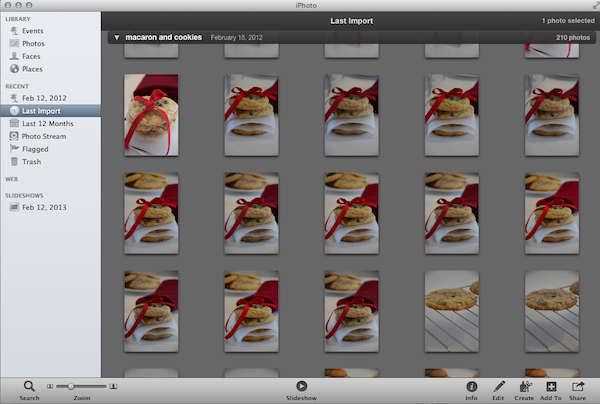
You can use DOF for creative impact, to separate the subject from its surroundings, to blur out a distracting foreground or background, to highlight your point of focus, and other purposes. This is usually done in-camera by adjusting your aperture. Explaining this would take a whole other post but just bear in mind that the bigger the aperture number (in reference to the lens opening) the greater the DOF. The smaller the aperture number, the shallower the DOF. Now that’s easy enough to remember, right?
{Bad, bad, bad photo taken at 1600 ISO very grainy}

As I said earlier, we can’t always get it right in-camera. Sometimes we don’t adjust the aperture as we want it to be, or our camera is a primitive point and shoot and doesn’t have an aperture adjustment setting, or we just forgot to fix the settings. The good news is we can still create DOF in Lightroom using the graduated filter.
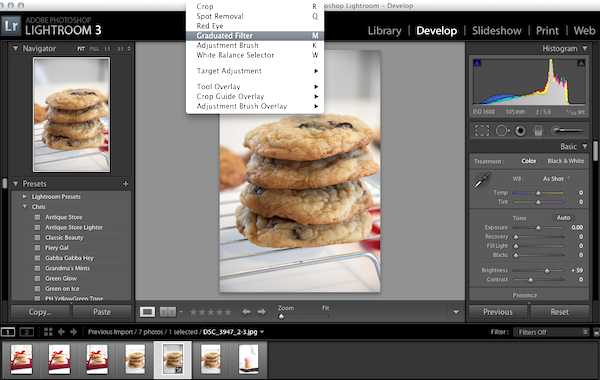
The term “graduated” means just that, a gradual change. With the graduated filter, you can edit exposure, sharpness, color balance, etc. This is also great for blurring out the background without making it look unnatural. To blur out the background in Lightroom, click and drag your cursor from the edge of the image frame to the image editing screen. This will show lines that will delineate the area you want to edit. You can adjust its angle and width just by dragging your cursor around the editing screen (don’t worry, you’ll quickly get the hang of it.) When the graduated filter lines are over the selected area, slide the Sharpness control to -100 to gradually blur the background from the subject. If you made a mistake, you can always undo what you did (wish this were always true in real life!).
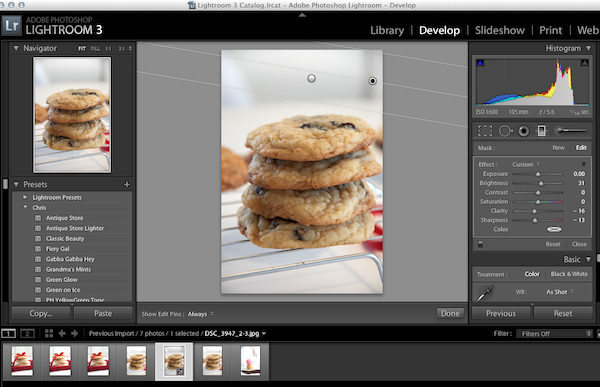
Of course, you can also use the adjustment brush to blur local areas but the graduated filter tool can give a more uniform editing and covers a larger ground with one tweak of your controls. Aside from Lightroom’s standard graduated filter, you can also buy graduated filter presets. I like to use Pretty Presets’ filters which include Green Grass, Soften Background, and Cool Haze. In case you’re wondering, no, I’m not a secret marketer for Pretty Presets or Lightroom, and I’m not getting a single penny from promoting their products (wish I was!). I just find their software really helpful because goodness knows how many of my shots have been improved with post-processing.
{Finished Editing}

 When we take photos, sometimes we get everything right in-camera and sometimes we need to improve them a bit more in post-processing using an image editing program (I use Adobe’s Lightroom). Aside from tweaking my shots to make them brighter, fixing any awful color cast, straightening out the crooked horizon, removing dust and distracting objects, we can also blur the background to create more depth of field (DOF). Take a peek at my Chocolate Chip cookies here, it was a bad day, bad lighting, and I didn't feel like lugging everything to the studio (I was full of excuses that day). We all have days like this working with photography, be it a professional or a novice. It's fixable.
{Take as many photos as possible}
 “What’s depth of field?” you might ask. Let me quote Wikipedia! “Depth of field (DOF) is the distance between the nearest and farthest objects in a scene that appear acceptably sharp in an image.” Simply put, it’s the area in your photo that looks focused compared to the rest of the image. If your photo is completely in focus, with everything sharp and defined, it’s called “deep focus” or having a great depth of field. If only your subject is clear while the foreground and background are blurry, it’s called “shallow depth of field.” This gives the impression of distance as the background looks farther away from the subject.
 You can use DOF for creative impact, to separate the subject from its surroundings, to blur out a distracting foreground or background, to highlight your point of focus, and other purposes. This is usually done in-camera by adjusting your aperture. Explaining this would take a whole other post but just bear in mind that the bigger the aperture number (in reference to the lens opening) the greater the DOF. The smaller the aperture number, the shallower the DOF. Now that’s easy enough to remember, right?
{Bad, bad, bad photo taken at 1600 ISO very grainy}
 As I said earlier, we can’t always get it right in-camera. Sometimes we don’t adjust the aperture as we want it to be, or our camera is a primitive point and shoot and doesn’t have an aperture adjustment setting, or we just forgot to fix the settings. The good news is we can still create DOF in Lightroom using the graduated filter.
 The term “graduated” means just that, a gradual change. With the graduated filter, you can edit exposure, sharpness, color balance, etc. This is also great for blurring out the background without making it look unnatural. To blur out the background in Lightroom, click and drag your cursor from the edge of the image frame to the image editing screen. This will show lines that will delineate the area you want to edit. You can adjust its angle and width just by dragging your cursor around the editing screen (don’t worry, you’ll quickly get the hang of it.) When the graduated filter lines are over the selected area, slide the Sharpness control to -100 to gradually blur the background from the subject. If you made a mistake, you can always undo what you did (wish this were always true in real life!).
 Of course, you can also use the adjustment brush to blur local areas but the graduated filter tool can give a more uniform editing and covers a larger ground with one tweak of your controls. Aside from Lightroom’s standard graduated filter, you can also buy graduated filter presets. I like to use Pretty Presets’ filters which include Green Grass, Soften Background, and Cool Haze. In case you’re wondering, no, I’m not a secret marketer for Pretty Presets or Lightroom, and I’m not getting a single penny from promoting their products (wish I was!). I just find their software really helpful because goodness knows how many of my shots have been improved with post-processing.
{Finished Editing}





Liz
March 20, 2012 at 8:43 pm //
Wow, what great information….I need to print it off and see if I can master this technique. Thank you!
myfudo
March 22, 2012 at 6:56 pm //
You’re welcome Liz, please enjoy the tips, we are glad they are of help = )
Liz
March 20, 2012 at 8:43 pm //
Wow, what great information….I need to print it off and see if I can master this technique. Thank you!
myfudo
March 22, 2012 at 6:56 pm //
You’re welcome Liz, please enjoy the tips, we are glad they are of help = )
Heather @ Better With Veggies
March 21, 2012 at 12:35 am //
Oh wow – I haven’t tried lightroom yet, but I might just need to now. This is a great tutorial and really shows how cleanly it can brighten your photos!
myfudo
March 22, 2012 at 6:57 pm //
Hi Heather, Adobe LightRoom is a wonderful program, they have a trial for 30 days you could try out first = )
Natalie
March 21, 2012 at 1:30 am //
I always have to shoot at night, so often times my photos don’t turn out how I’d like. Thanks for the tutorial! I’ll definitely put this to good use! Got to love Lightroom!
myfudo
March 22, 2012 at 6:58 pm //
You’re welcome Natalie, we are so happy the tips are useful = )
Angie@Angie's Recipes
March 21, 2012 at 5:04 am //
Thanks for this cool tip!
myfudo
March 21, 2012 at 5:17 pm //
You are welcome Angie = )
Angie@Angie's Recipes
March 21, 2012 at 5:04 am //
Thanks for this cool tip!
myfudo
March 21, 2012 at 5:17 pm //
You are welcome Angie = )
Ambika
March 21, 2012 at 6:17 am //
Such a wonderful and helpful post!!!
myfudo
March 21, 2012 at 5:17 pm //
Thank you Ambika.
Ambika
March 21, 2012 at 6:17 am //
Such a wonderful and helpful post!!!
myfudo
March 21, 2012 at 5:17 pm //
Thank you Ambika.
Lynn @ I'll Have What She's Having
March 21, 2012 at 6:30 am //
Thanks for the tips! I recently switched from photoshop elements to lightroom, and I’m still figuring out all the little tricks to it. So far I love it.
myfudo
March 21, 2012 at 5:19 pm //
Hi Lynn, we think you’ll find that lighroom lends a bit more for the photo editing process, photoshop works well with portraits, if you are using photoshop actions, for example. But Lightroom has presets as well. Photoshop is more for photo manipulation. We are so happy you are enjoying the tips and tricks =)
Joanne
March 21, 2012 at 7:05 am //
Great info. I looked at Light room but didn’t get the hang of it so never bought it. Do you think it’s easier than PhotoShop Elements?
It’s sad to say this but your “bad” photo looks like some of my best.
myfudo
March 22, 2012 at 6:59 pm //
Hi Joanne, it is a great program for post processing, more so in food photography, you have more tools and more control, I like elements but more for manipulation. Let us know what area you need help with, and we’ll try and get a tutorial up = )
Cindy
March 21, 2012 at 7:24 am //
Looking at your tutorial always making me want to learn LightRoom! (I’m using CS3 still)~Maybe it’s time for an update!
myfudo
March 21, 2012 at 10:31 am //
Hi Cindy, CS3 is a powerful, wonderful program, and I do like using Photoshop actions for portraits, but for really precise control and editing photos without any manipulation, lightroom is where I do 90% of my post processing. Give it a try, you can download it for free for 30 days I think. And please let us know if you have any questions, we’ll do our best to help.
myfudo
March 22, 2012 at 1:26 pm //
Hi Cindy, can you download the trial first, give it a run? It really is a nice post processing program, photoshop while is wonderful, we feel it’s more for photo manipulation, although, using actions sets for portraits are wonderful and produce some really lovely outcomes.
kyleen
March 21, 2012 at 9:34 am //
I would have never guessed that you edited your pictures–they always look so natural. Thanks for the great tips.
myfudo
March 21, 2012 at 10:29 am //
We wish there were days when we didn’t have to, but sometimes, there are just bad photo days, bad lighting, (feeling lazy) “wink”. We thought these were unfixable shooting at a 1600 ISO, but lightroom has made editing so much more easier. Thank you so much for the kind comment = )
the food dude
March 21, 2012 at 11:55 am //
Excellent tip, I’m still really learning post processing and this is a real help!
myfudo
March 22, 2012 at 1:24 pm //
So happy you are finding them helpful = )
the food dude
March 21, 2012 at 11:55 am //
Excellent tip, I’m still really learning post processing and this is a real help!
myfudo
March 22, 2012 at 1:24 pm //
So happy you are finding them helpful = )
Divya @ FF
March 21, 2012 at 3:07 pm //
Oh wow, editing made a huge difference to that photo. I just recently started using Lightroom for basic edits and I’m always trying to learn new tricks. Love this post – going to bookmark and come back later to read in detail!
myfudo
March 22, 2012 at 1:24 pm //
You are welcome Diya, so happy you are finding our tutorials useful = )
kitchenriffs
March 22, 2012 at 12:27 am //
Great tips! I’m currently using Photoshop (you can do the same thing in that) but plan to migrate to Lightroom eventually (Photoshop is just overkill for my needs). Anyway, I don’t use enough of these tools – thanks for the simple, clear instructions.
myfudo
March 22, 2012 at 1:23 pm //
You are welcome, yes, that is very true, while photoshop is powerful, it’s more for manipulation, whereas lightroom has more tools for post processing. Photoshop is wonderful to use with portraits, like buying action sets, and lightroom has presets. Give the trial a try, we will be uploading some presets for food photography, so hopefully they’ll be useful = )
Maggie
March 22, 2012 at 12:29 am //
This is a GREAT tutorial! I am going to look into this photo editing software. Right now I just use Picasa and it is pretty limited in regards to what you can do. I am almost positive you can’t do anything this cool in Picasa. Always looking for ways to improve my photos, so…Thank you!
myfudo
March 22, 2012 at 1:20 pm //
We think you’d be really happy if you invested into Lightroom, but you can download the free trial and give it a try first? We will be adding more tutorials, hope you enjoy them.
Nic
March 22, 2012 at 12:49 am //
Great tips and your photo has me licking the screen!
myfudo
March 22, 2012 at 1:19 pm //
Thank you Nic.
Nic
March 22, 2012 at 12:49 am //
Great tips and your photo has me licking the screen!
myfudo
March 22, 2012 at 1:19 pm //
Thank you Nic.
torviewtoronto and createwithmom
March 22, 2012 at 10:20 am //
lovely post
myfudo
March 22, 2012 at 1:19 pm //
Thank you.
torviewtoronto and createwithmom
March 22, 2012 at 10:20 am //
lovely post
myfudo
March 22, 2012 at 1:19 pm //
Thank you.
Mama's Gotta Bake
March 22, 2012 at 3:02 pm //
Wonderful info! I love when folks share their expertise. Greatly appreciated.
myfudo
March 22, 2012 at 3:36 pm //
You are truly welcome.
Mama's Gotta Bake
March 22, 2012 at 3:02 pm //
Wonderful info! I love when folks share their expertise. Greatly appreciated.
myfudo
March 22, 2012 at 3:36 pm //
You are truly welcome.
Mzungu
March 22, 2012 at 6:45 pm //
Hi,
Thanks for the great tips. My fotos do leave a lot to be desired, but with some tinkering they may be slightly better.
myfudo
March 22, 2012 at 6:56 pm //
You’re welcome, please enjoy them = )
Mzungu
March 22, 2012 at 6:45 pm //
Hi,
Thanks for the great tips. My fotos do leave a lot to be desired, but with some tinkering they may be slightly better.
myfudo
March 22, 2012 at 6:56 pm //
You’re welcome, please enjoy them = )
Kiran @ KiranTarun.com
March 23, 2012 at 4:53 am //
Great tutorial on DOF. Thanks for sharing the Lightroom tut :)
myfudo
March 24, 2012 at 1:31 pm //
Thank you Kiran = )
Kiran @ KiranTarun.com
March 23, 2012 at 4:53 am //
Great tutorial on DOF. Thanks for sharing the Lightroom tut :)
myfudo
March 24, 2012 at 1:31 pm //
Thank you Kiran = )
melissa@the hungry artist
March 28, 2012 at 5:17 am //
Great post — thank you for the information. I don’t have Lightroom, but the info is useful in general for taking photos. :)
myfudo
March 28, 2012 at 7:39 am //
You are welcome Melissa = )
melissa@the hungry artist
March 28, 2012 at 5:17 am //
Great post — thank you for the information. I don’t have Lightroom, but the info is useful in general for taking photos. :)
myfudo
March 28, 2012 at 7:39 am //
You are welcome Melissa = )